The blades are put in on the rotor discs through a special prepared place. This "entry" is invisible before, but the dissasembly process starts exactly in this place.
 The pictures shows a blades locking set . The locking inserts are marked, beetween them there are seven blades. The blade in the middle, marked with black dot is the locking blade.
We have to put out the locking blade and then the rest is quite simple.
The very first step is to get rid off the shrouds. As the new blades with the additional hardware will be installed, there is on needs to be gentle - a hand grinder is used.
We have to reach the two locking inserts, that is why the locking blades and couples adjacent ones are cut off.


Just now there is convinient acces to the locking inserts, which are disassembled.
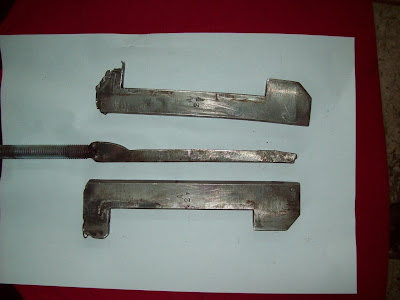
Each locking insert consists of three parts.

The pictures presents the locking insert, which we managed to put out with minimum damages.
The middle parts of the insert can be removed as a one piece but it is very hard to do and consumes a lot of time, so we safed only a very few samples and a rest were destroied during the removal works.
We make a hole in middle parts of the insert, so this was changed into chips. Below the insert is visible after the blade cut off.
The insert boring:
The insert boring:

