A couple days ago we had problem related to poor vaccum in steam turbine condenser.
The vaccum was on the level of 81-82 kPa. The normal level is around 90 kPa. Low vaccum creates the unit load limit that is so important keeps it as designed.
Before the vaccum drop there had been a turbine trip. The machine was taken in service again but trough the some moment the LP bypass got pressurized and the LP bypass pipeline shook. The turbine was operated under stable condition but the vaccum did not come to previous, required level.
All vaccum pumps were taken into service but it did not help, in paralel we started to search for the reason.
The fitters found the manhole withe air ingress. The manhole is located on the LP bypass pipe just before the connection of it with condenser shell. It was sealed, the screws tightened (some of them were loose). The vaccum is improved now almost 90 kPa.
wtorek, 29 marca 2011


piątek, 11 marca 2011
The BFP mechanical seals coolers
The unit we operate and maintain is equipped with 3 boiler feed pumps.
Two of them are turbine driven and the third one is motor driven.
To prevent feed water going out of the pump the mechanical seal is in place.
The temperature of the feed water is 160 C deg (at full load - 600 MW it can be even 180 C deg)
The temp of the BFP casing is 136/132 C deg (lower part/upper part respectively).
The original desing of the BFP include the cooling circulation of the mechanical seals:
 The reason of this cooling is simple the mechanical seals OEM put the remark in seals manual that seals working temp should not be higher than 80 C deg (at 90 the manual pump trip should be applied).
The eraction team has done some modification in the cooling system and what we have on site is:
 There is no cooling provided and the working temp. of mechanical seals is 50 C deg than it was designed. Definitely, it is going to affect seals lift time. Our proposal is to put the coolers back in place according to OEM design.
We will see what will happen
Two of them are turbine driven and the third one is motor driven.
To prevent feed water going out of the pump the mechanical seal is in place.
The temperature of the feed water is 160 C deg (at full load - 600 MW it can be even 180 C deg)
The temp of the BFP casing is 136/132 C deg (lower part/upper part respectively).
The original desing of the BFP include the cooling circulation of the mechanical seals:

The eraction team has done some modification in the cooling system and what we have on site is:

We will see what will happen
niedziela, 27 lutego 2011
Came back
It has been long time when I put here last post.
There is a reason for this. It can be said that I am on the opposite side just now. Why?
Yeah, previously I was a part of company offering the unique and specialized services for power plants. It was great job ... . Anyway I felt that time that my knowledge is not complete. Yes, I dealt with steam turbines and a number of technical issues related to them but I was still out of the place where the steam turbines are used daily - the power plant.
Just now I work for company which run power plant, quite large ... 4 x 600 MW.
So, I am still within power industry but in the other corner. It is not the same what I did before but can almost touch the turbine while it is working.
The blog is going to change accordingly. Still it is dedicated to the steam turbines but more to their daily maintenance than overhauls but sooner or later the overhauls will come.
There is a reason for this. It can be said that I am on the opposite side just now. Why?
Yeah, previously I was a part of company offering the unique and specialized services for power plants. It was great job ... . Anyway I felt that time that my knowledge is not complete. Yes, I dealt with steam turbines and a number of technical issues related to them but I was still out of the place where the steam turbines are used daily - the power plant.
Just now I work for company which run power plant, quite large ... 4 x 600 MW.
So, I am still within power industry but in the other corner. It is not the same what I did before but can almost touch the turbine while it is working.
The blog is going to change accordingly. Still it is dedicated to the steam turbines but more to their daily maintenance than overhauls but sooner or later the overhauls will come.
poniedziałek, 24 maja 2010
The blade groove crack removal
In March I wrote a couple of words about rotors which had cracks in blade groove.
The picture showed an example. Since that time these cracks have been removed.
It had not been easy to get rid off cracks located in such places like the egdes of blade groove. To do it, a special cutting tools were needed.
I am not a machining specialist but I have dealt with various machining issues and that is why I managed to create the cutting tools and proper machining technology to get rotors free of cracks.
Below, is a cut section of blade groove.
 The shape in the edge 9 and 7 is what we got after machining. A lack of cracks was confirmed by NDE.
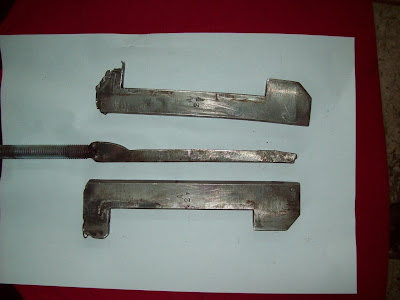
The cutting tools, we used :


The two pictures above show the tool used in first step of machining. To get shape from the first drawing the next tool was necessary


It is almost impossible to take pictures showing what is the blade groove geometry right now, anyway the machining path is visible and the rest is the same like on the drawing on the top of this post

The picture showed an example. Since that time these cracks have been removed.
It had not been easy to get rid off cracks located in such places like the egdes of blade groove. To do it, a special cutting tools were needed.
I am not a machining specialist but I have dealt with various machining issues and that is why I managed to create the cutting tools and proper machining technology to get rotors free of cracks.
Below, is a cut section of blade groove.
 The shape in the edge 9 and 7 is what we got after machining. A lack of cracks was confirmed by NDE.
The cutting tools, we used :


The two pictures above show the tool used in first step of machining. To get shape from the first drawing the next tool was necessary


It is almost impossible to take pictures showing what is the blade groove geometry right now, anyway the machining path is visible and the rest is the same like on the drawing on the top of this post

wtorek, 6 kwietnia 2010
The calculation on rotor disc and the locking blade
It is not complicated to carry out this job but there are some steps critical which done improperly can cause disaster. Frankly speaking, reparing steam turbines, there is allways a must to think what would be the results of some "shorcuts".
That is why, the experience is very important. Especially, a blading work is one of the most sensitive. Take into account that the turbine rotor works in exceptional conditions: high temperature (~ 550 C deg), high pressure and forces created by elements weight, a rotor rotation (a couple of thousand rpm's), etc ... .
Anyway, the first stage consist of 52 blade sets, each set contains two blades welded together. Two sets are the locking sets. The locking sets are fixed to the disc using 4 pins. The core of reblading activity is to remove the pins. Usually, the pins are removed by boring them and here we have the most dangerous part of whole procedure. The pins boring have to be done in this way that the holes diameter in disc will be the same after boring - the holes clean up is acceptable but the diameter must not be bigger than certain value. A material thickness on the rotor disc in pins mounting area determines the pin holes diameters.
It can happen that after a few repairs of this rotor stage the pin holes are an ovals or were not bored perpendicular to the rotor disc.
Than it is technical correct to bore new holes but they will be bigger but as mentioned above holes can be increased only to some level as the stresses are important.
This conditions were met during a project supervised by me.
We had ovality on pin holes and some ot them were not perpendicular to the rotor disc.
I defined what would be the diameters of new holes and asked my colleague to perform stress calculation if disc material left is enough to carry forces.
He used FEA method to do it. I am not familiar with this but it is common for design dept. around the world.
Fortunatelly, it turned out that new holes diameters are ok and we act in this way.
Below, there are a couples of pictures presenting MES calculation.


środa, 17 marca 2010
IP rotor after fact finding activity
One of the IP rotor of two 150 MW units is in very bad condition.
The run- out measurement revealed the rotor curvature.

What we measured is showed on the chart above. The curve is the rotor's axis.
The rotor is bent and max run- out 0.23 mm is located behind 1 stage.
There are two most often applicable ways to get rid off curvature.
The first one is to machine the rotor and remove a "plus indications" so the rotor would be machined only at certain angle if material thickness to be removed was no more than 0.23 mm.
I have not seen such solution so far. The solution, we usually use is to define new rotor axis. In this particular case the new fix points sholud be a journal at IP-LP coupling and place when max run-out is measured. Next, the HP end of the rotor would be machined.
We have done such machinings but for the rotors which were not bent so much. At max indications ~ 0.15 mm. In fact the internal tensions are still present and can cause further axis deformation. We have noticed this process.
The right technical solution applied in this case is to perform thermal streightening and after this repair step to machine rotor.
The final decision will be taken shortly on the customer meeting.
The rotor curvature is not the only problem we found.
The rotor blade groove edges are cracked. Allways rotor cracks are very hard task to deal with.We have found different kinds of cracks.
1. The cracks inside the blade groove

2. The blade groove edges cracks.

czwartek, 11 lutego 2010
IP rotor reblading next steps
The inserts are removed, so the next step is to put out the blade which is in the middle. To do it it is necessary to move adjacent blades.


The teeth are on the both side of the locking blades, on the picture above only the convex blade side teeth are shown but on the concave blade side the teeth are present as well.

 The rest stages were rebladed in exactly the same way.
The insert was removed
The adjacent blades were moved clockwise and counterclockwise
and the middle blade is being released now

The middle blade/locking blade was removed
 The middle/locking blade
The teeth are on the both side of the locking blades, on the picture above only the convex blade side teeth are shown but on the concave blade side the teeth are present as well.
When the middle/locking blade is out of the groove the next blades can be put out.
The set of locking blades is shown below. On the right hand side is the locking balde (the teeth are visible from both blde side). The blades with numbers are these ones which adhere to the locking blade form rigth and left hand side.
 The locking set in removed, so just now the rest of the blades will be dissasembled. It takes some time as it has to be done piece by piece,
The rest stages were rebladed in exactly the same way. niedziela, 10 stycznia 2010
IP rotor blades removal - 150 MW turbine
The scope of works for IP rotors includes the exchange of the blades. To do it, firstly the existing blades have to be disassembled. I would like to show a blades dissasembly process.  The pictures shows a blades locking set . The locking inserts are marked, beetween them there are seven blades. The blade in the middle, marked with black dot is the locking blade.

The pictures presents the locking insert, which we managed to put out with minimum damages.
The blades are put in on the rotor discs through a special prepared place. This "entry" is invisible before, but the dissasembly process starts exactly in this place.
The pictures shows a blades locking set . The locking inserts are marked, beetween them there are seven blades. The blade in the middle, marked with black dot is the locking blade.We have to put out the locking blade and then the rest is quite simple.
The very first step is to get rid off the shrouds. As the new blades with the additional hardware will be installed, there is on needs to be gentle - a hand grinder is used.
We have to reach the two locking inserts, that is why the locking blades and couples adjacent ones are cut off.
Just now there is convinient acces to the locking inserts, which are disassembled.
Each locking insert consists of three parts.
The pictures presents the locking insert, which we managed to put out with minimum damages.
The middle parts of the insert can be removed as a one piece but it is very hard to do and consumes a lot of time, so we safed only a very few samples and a rest were destroied during the removal works.
We make a hole in middle parts of the insert, so this was changed into chips. Below the insert is visible after the blade cut off.
The insert boring:
The insert boring:


niedziela, 3 stycznia 2010
150 MW turbines - continuation
Happy New Year to everyone who visits my blog ... .
I would like to specify what is the scope of work for the rotors, I mentioned in my previous post.
I think, that is a first approach and will be updated after fact finding activity we are doing since the middle of December , so here we have:
1. The HP rotors.
- blasting,
- NDT examination,
- measurement of the rotor's geometry,
- seal strips exchange,
- machining of a bearing journals, seal strips,
This is what I know for today but once any damages are revealed during NDT, the scope of work will be increased, certainly customer has to accept our proposals.
2. The IP rotors.
- blasting,
- NDT examination,
- measurement of the rotor's geometry,
- seal strips exchange,
- machining of a bearing journals, seal strips,
- all stages reblading
Similar remarks like above it had been defined before casings opening, so if customer agrees to accept an additional, necessary works, we will do it.
3. The LP rotors.
- blasting,
- NDT examination,
- measurement of the rotor's geometry,
- seal strips exchange,
- machining of a bearing journals, seal strips,
- reblading of L0 and L1 stages
I would like to specify what is the scope of work for the rotors, I mentioned in my previous post.
I think, that is a first approach and will be updated after fact finding activity we are doing since the middle of December , so here we have:
1. The HP rotors.
- blasting,
- NDT examination,
- measurement of the rotor's geometry,
- seal strips exchange,
- machining of a bearing journals, seal strips,
This is what I know for today but once any damages are revealed during NDT, the scope of work will be increased, certainly customer has to accept our proposals.
2. The IP rotors.
- blasting,
- NDT examination,
- measurement of the rotor's geometry,
- seal strips exchange,
- machining of a bearing journals, seal strips,
- all stages reblading
Similar remarks like above it had been defined before casings opening, so if customer agrees to accept an additional, necessary works, we will do it.
3. The LP rotors.
- blasting,
- NDT examination,
- measurement of the rotor's geometry,
- seal strips exchange,
- machining of a bearing journals, seal strips,
- reblading of L0 and L1 stages
poniedziałek, 21 grudnia 2009
The 150 MW turbines
We got a two turbine units. Both of them are a subject of the overhaul project and both of them are the 150 MW turbine but this feature will change as one of the project aims is to increase the trubine efficiency. The IP steam path is about to replace and two stages at LP rotor as well.
Let me present a drawing of this turbine:
1. HP part
It is impulse part with 18 stages, one outer casing, two bearings. The bearing no.1 is a radial one and the bearing no. 2 is a combined one axial-radial.
2. IP part
This has 15 stages and similar to HP, one casing, two radial bearings (no. 3 and 4)

3. LP part

A double-flow rotor, the two radial bearings (no.5 and 6), the rigid couplings
4.The Generator left in power plant, so no activities on our workshop linked with this turboset part - at least I do not know what is work scope for gen. parts.
Let me present a drawing of this turbine:
1. HP part

It is impulse part with 18 stages, one outer casing, two bearings. The bearing no.1 is a radial one and the bearing no. 2 is a combined one axial-radial.
2. IP part
This has 15 stages and similar to HP, one casing, two radial bearings (no. 3 and 4)

3. LP part

A double-flow rotor, the two radial bearings (no.5 and 6), the rigid couplings
4.The Generator left in power plant, so no activities on our workshop linked with this turboset part - at least I do not know what is work scope for gen. parts.
środa, 11 listopada 2009
november's news
I got an info regards the turbine start up after the outage my company did.
It seems we did good job. There was no problems during start and trial period. The additional balancig activity is forseen as the dynamic state of whole machine can be improved. The overhaul agreement includes the vibration limits after assembly, so we are just now slightly above what was written down.
It seems we did good job. There was no problems during start and trial period. The additional balancig activity is forseen as the dynamic state of whole machine can be improved. The overhaul agreement includes the vibration limits after assembly, so we are just now slightly above what was written down.
piątek, 30 października 2009
I am back
Short explanation why such long break.
The summer is the overhaul time, so each company in my sector is busy. I was tired after work and had no power to open my blog but I going to continue and this "diary" will be enriched with more posts.
During this weekend the start up of turbine, I described in my previous post, is planned. Coming back to office on Monday some details will be known. Certainly, I will touch this then.
In the mean time I has supervised the outage of ten rotors - 4 HP rotors, 3 IP rotors and 4 LP rotors but it is not the end as maybe fifth LP rotor will come. It is intersting story what we went trough with last two LP rotors but I will mention this later.
All rotors are the rotors of the 200 or 225 MW turbines. In fact it is the same desing but each turbine has been modernized up to certain level and that is why the turbine efficiency is different.
The first turbine is 200 MW. We got 3 rotors from this turbine for the overhaul process in the same time but very quick was obvious that the HP rotor is in worse technical condition than was foreseen. The first and secound stage were damaged. Blades and shrounds should be exchanged but no money was budgeted for such operation, so after meeting with customer it was decide to leave the rotor as it is and repair the spare one bought a several years before. Customer thoght that rotor HP no. 2 is in better technical condition. After NDT activity we did, it was clear that blades are ok but shrounds in 2 stages needed repleacement. The secound customer meeting took place to spread info and propose solution.
The power plant people agreed with us what to do and I prepared the technology charts accordingly.
The new shrounds were put on.
The IP rotor overhaul was enlarged in similar way like HP rotor case. Here the one shround was exchanged only.
It is easy to write that overhaul scope was increased but the the overhaul deadline was not changed at all. It means, we were forced to do more job in originally planned period of the time even when the scope was wider. Anyway we managed to do it. Honestly, the new repair circumstances affected the timing and we got one week more.
The secound turbine is the 225 MW turbine with different LP rotor. It is larger, heavier than previous one. It was modernized in 2001 by Westinghouse.
It made some troubles for us, as our sand blasting room is not big enough for such rotors. I found soultion. I had read about dry ice blasting. This technology seemed to be great in this particular case. It does require seperat place to clean dirt turbine part. I found 3 companies offering this technology. All of them saw our rotor and one of the did a little trial to see if it is possible to clean our "fan".
We saw results and took a challange. Dry ice blasting is very noisy and not as good as it looked like doing the trial.
Usually we need 2-3 days (with 1 shift daily) to clean the big rotor but now was necessary to devote 5 days with 2 shifts daily to get the LP rotor cleaned. Uff... dry ice blasting is not the best idea, is too slow.
to be continued ...
The summer is the overhaul time, so each company in my sector is busy. I was tired after work and had no power to open my blog but I going to continue and this "diary" will be enriched with more posts.
During this weekend the start up of turbine, I described in my previous post, is planned. Coming back to office on Monday some details will be known. Certainly, I will touch this then.
In the mean time I has supervised the outage of ten rotors - 4 HP rotors, 3 IP rotors and 4 LP rotors but it is not the end as maybe fifth LP rotor will come. It is intersting story what we went trough with last two LP rotors but I will mention this later.
All rotors are the rotors of the 200 or 225 MW turbines. In fact it is the same desing but each turbine has been modernized up to certain level and that is why the turbine efficiency is different.
The first turbine is 200 MW. We got 3 rotors from this turbine for the overhaul process in the same time but very quick was obvious that the HP rotor is in worse technical condition than was foreseen. The first and secound stage were damaged. Blades and shrounds should be exchanged but no money was budgeted for such operation, so after meeting with customer it was decide to leave the rotor as it is and repair the spare one bought a several years before. Customer thoght that rotor HP no. 2 is in better technical condition. After NDT activity we did, it was clear that blades are ok but shrounds in 2 stages needed repleacement. The secound customer meeting took place to spread info and propose solution.
The power plant people agreed with us what to do and I prepared the technology charts accordingly.
The new shrounds were put on.
The IP rotor overhaul was enlarged in similar way like HP rotor case. Here the one shround was exchanged only.
It is easy to write that overhaul scope was increased but the the overhaul deadline was not changed at all. It means, we were forced to do more job in originally planned period of the time even when the scope was wider. Anyway we managed to do it. Honestly, the new repair circumstances affected the timing and we got one week more.
The secound turbine is the 225 MW turbine with different LP rotor. It is larger, heavier than previous one. It was modernized in 2001 by Westinghouse.
It made some troubles for us, as our sand blasting room is not big enough for such rotors. I found soultion. I had read about dry ice blasting. This technology seemed to be great in this particular case. It does require seperat place to clean dirt turbine part. I found 3 companies offering this technology. All of them saw our rotor and one of the did a little trial to see if it is possible to clean our "fan".
We saw results and took a challange. Dry ice blasting is very noisy and not as good as it looked like doing the trial.
Usually we need 2-3 days (with 1 shift daily) to clean the big rotor but now was necessary to devote 5 days with 2 shifts daily to get the LP rotor cleaned. Uff... dry ice blasting is not the best idea, is too slow.
to be continued ...
wtorek, 7 lipca 2009
the rotors to be repaired
I had opportunity to supervise overhaul of a couple of rotors.


 "Naked" rotor shaft with no discs, the bigest ones are visible.


 These cracks are the beginning of possible disaster, that is why we and customer took decision to repare the discs.
We proposed the followin steps :


 It took several hours to heat up the disc and get enough internal diameter. The interference is 0.6 mm. To mount discs on the rotor we decided to heat them untill the clerance is 0.5 mm.
We needed almost one week to put 10 discs on the rotor but it was not the end as the steam gland bushes and finally couplings had to be assembled as well.
We managed to it and after run out measurement it turned out that some surfaces should be machined when done the very last step - low speed balancing.
I will write a few words about turbine start up but wait some time.
The first one and the most complicated is the the repair of the LP rotor of 100 MW turbine.
It is double flow rotor and have 10 discs mounted on it.
It is double flow rotor and have 10 discs mounted on it.
During the NDT technicians found the cracks in the corner of keyway at 6 discs.
Let me present the pictures taken before discs dissasembly.
Let me present the pictures taken before discs dissasembly.
"Naked" rotor shaft with no discs, the bigest ones are visible. Next pictures present the dissasembled disc
These cracks are the beginning of possible disaster, that is why we and customer took decision to repare the discs.We proposed the followin steps :
- dissasembly of all discs,
- NDT examination,
- machining the internal diameter of discs to remove the craced area,
- prepare the bushes,
- mount the bushes into discs with light interference,
- drill radial holes through the bush and disc and install pins with light interference.
The customer accepted our solution, so we started to collect the material and parallel prepared the discs.
I ordered the bushes at foundry and prepared the drawnigs how to machine the discs.
After 4 weeks we got row bushes then they were machined and put into discs.
The next step was to drill radial holes inside the discs. It seems to be qiute easy and in fact it is easy but we have too big angle head for our milling machine them we had a lot of problems to obtain what was designed. At bigest discs, which has the least hole I asked designer not to drill holes as deep as it was drawn.
In the same time the pins were prepared, then we put them into drilled holes. I wrote, the pins to be installed with light interference but to make the assembly quick we used nitrogen to cool them down.
This part was finalized but it is not the end. Now is final machinig. The discs are installed onto rotor with interferance ~ 0.60 mm, so the diameter is very important and tolerances are very tide.
The very last step of machining is keyway milling. We did it partialy inhouse, and using external subcontactors.
I put a couple of pictures taken at differt assembly steps
This is the end of machining and the assembly phase was started.
Below we have the hanging rotor shaft a few secounds before 1st disc assembly
Below we have the hanging rotor shaft a few secounds before 1st disc assembly
 It took several hours to heat up the disc and get enough internal diameter. The interference is 0.6 mm. To mount discs on the rotor we decided to heat them untill the clerance is 0.5 mm.
We needed almost one week to put 10 discs on the rotor but it was not the end as the steam gland bushes and finally couplings had to be assembled as well.
We managed to it and after run out measurement it turned out that some surfaces should be machined when done the very last step - low speed balancing.
I will write a few words about turbine start up but wait some time.
niedziela, 17 maja 2009
welding repair of the rotor
In my previous post I mentioned about the rotor welding repair. Let me add more info.
During the NDE it was found that it has crack placed next to journal under thrust collar. On the picture below (arrow) it is visible - thrust collar is diassembled.

Firstly, the rotor end was cut and shaft chamfered. The stub shaft was sent to us by our colleagues and welded by TIG to the main part of the rotor. The most important activity was carried out next - putting the material by SAW. It took several days and was splited into a few phases. After welding certain material thickness we machined it and did NDE to be sure if weld is free from any mistakes.
When welding was done I took over the responsibility. The two last steps remain. The rotor PWHT and machining.
To perform PWHT the rotor had to be positioned vertically. It is not usual to see rotor set in vertical position and to do it the special equipment was necessary - based on former solution I designed some devices.
The pictures below show the rotor uplift:
- rotor after rough machinig before PWHT

The rotor PWHT is starting ...


During the NDE it was found that it has crack placed next to journal under thrust collar. On the picture below (arrow) it is visible - thrust collar is diassembled.
Firstly, the rotor end was cut and shaft chamfered. The stub shaft was sent to us by our colleagues and welded by TIG to the main part of the rotor. The most important activity was carried out next - putting the material by SAW. It took several days and was splited into a few phases. After welding certain material thickness we machined it and did NDE to be sure if weld is free from any mistakes.
When welding was done I took over the responsibility. The two last steps remain. The rotor PWHT and machining.
To perform PWHT the rotor had to be positioned vertically. It is not usual to see rotor set in vertical position and to do it the special equipment was necessary - based on former solution I designed some devices.
The pictures below show the rotor uplift:
- rotor after rough machinig before PWHT

 - the rotor uplift


The rotor is hanging and will be fixed for PWHT
The rotor PWHT is starting ...
Original rotor design was changed. Just now the thrust collar is an integral part of the rotor shaft when previously collar was a seperate part and mounted on the shaft with negative allowance.
The repair last step carried out in our workshop and supervised by me was the final machining. I got the drawing, but the technology chart prepared on my own. As usually not all info was put on the drawing but I manged to get the missing data and below we can see the rotor end after final machining:
Once machinig was finished the rotor was moved to the our subcontractor - for high speed balancing.
I know that the customer has more rotors (2 pcs.?) with similar crack and maybe the repair process will done again... who knows...
Subskrybuj:
Posty (Atom)

